
How to Create an Instagram Banner in Canva

Did you know you can create an Instagram “banner” in Canva?
If you’ve ever scrolled past an Instagram profile that looks instantly polished, chances are they’ve used banners or seamless grid posts. Good news? You can create your own in Canva. In this post, I’ll show you exactly how to create an eye-catching Instagram banner step by step.
You can watch the tutorial in the video below, or scroll to beneath the video for step by step instructions.
Step 1: Set Up Your Canvas
Open Canva and create a new design.
Choose the custom dimensions 3240 x 1440 px
You’ll design the whole banner at once, and later you’ll slice it into squares.
Step 2: Create Your Banner Design
Add a background color or image that fits your brand.
Use Canva’s grid lines or the “Rulers & Guides” feature (under File → Show rulers and guides) to divide your canvas into equal posts for your feed. You’ll add the first guide (vertically) at 1080, and the second at 2160.
Place your text, photos, or illustrations so they flow across the sections without being cut off awkwardly. Think of it like a panoramic design.


Step 3: Keep It Consistent
Stick to your brand fonts and colors for a cohesive look.
Use repeating elements (like icons, brush strokes, or shapes) to connect the posts.
Less is more—simple, bold designs tend to look the best when split up.
Step 4: Slice Your Banner
Once your design is complete, click on the background so that the entire image is selected (outlined in purple).
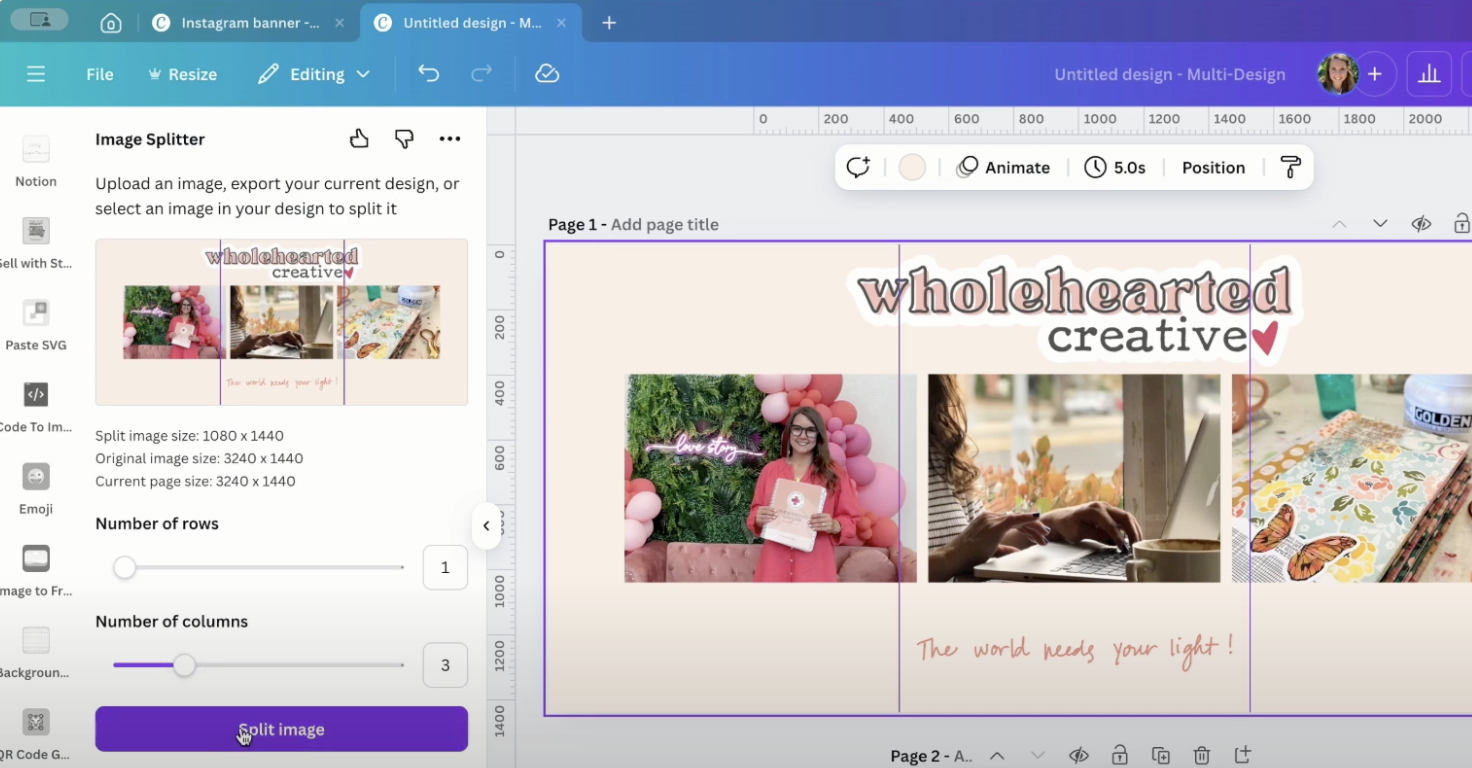
Go to “apps” in the left column and type “Image Splitter”, then choose the app as shown below.
Click “export image”
Set number of rows to 1 and number of columns to 3 and click “split image”.
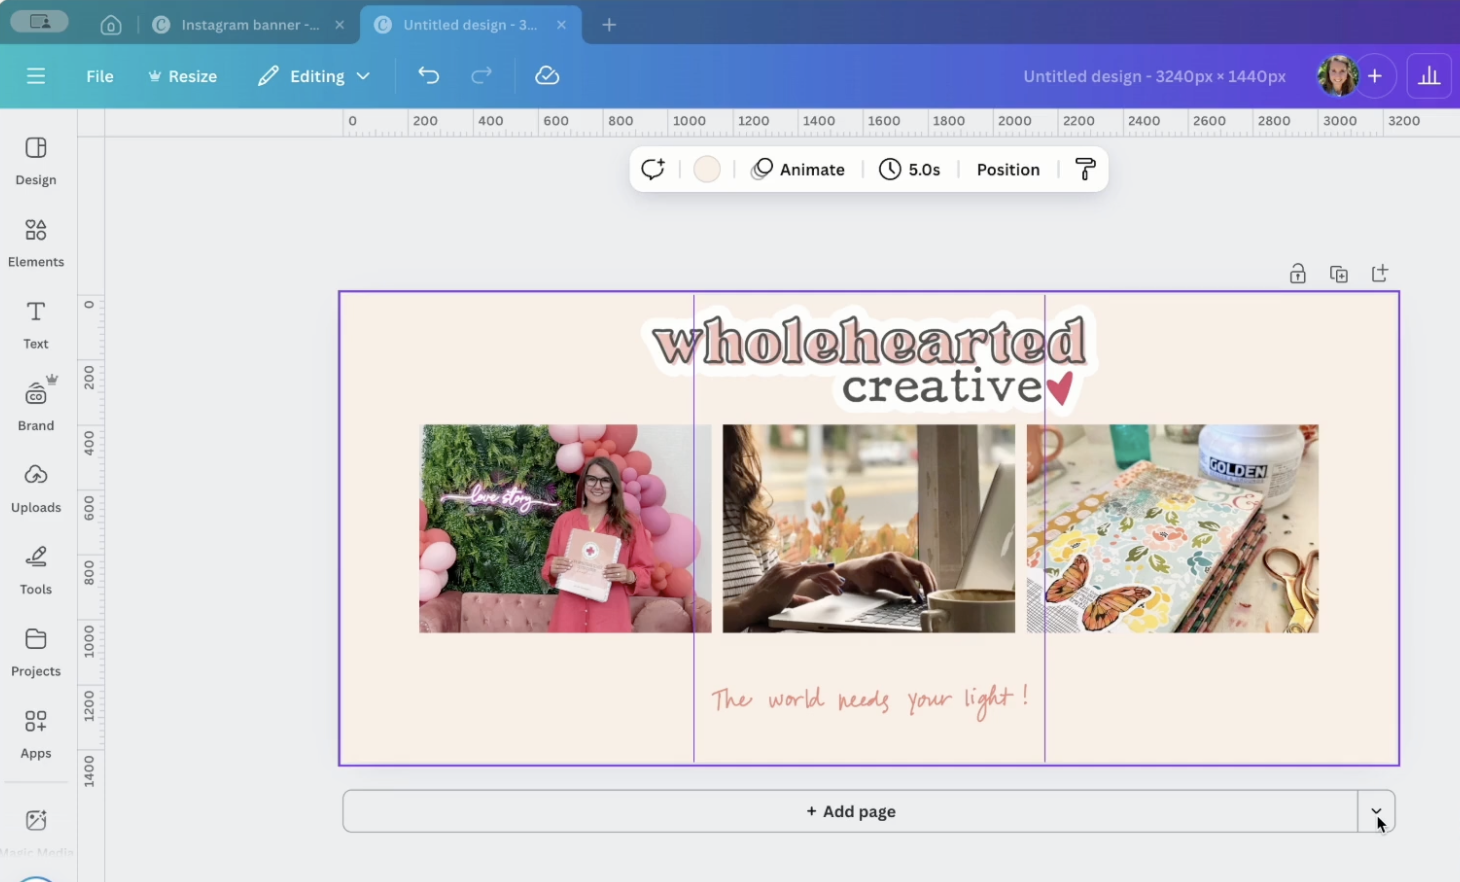
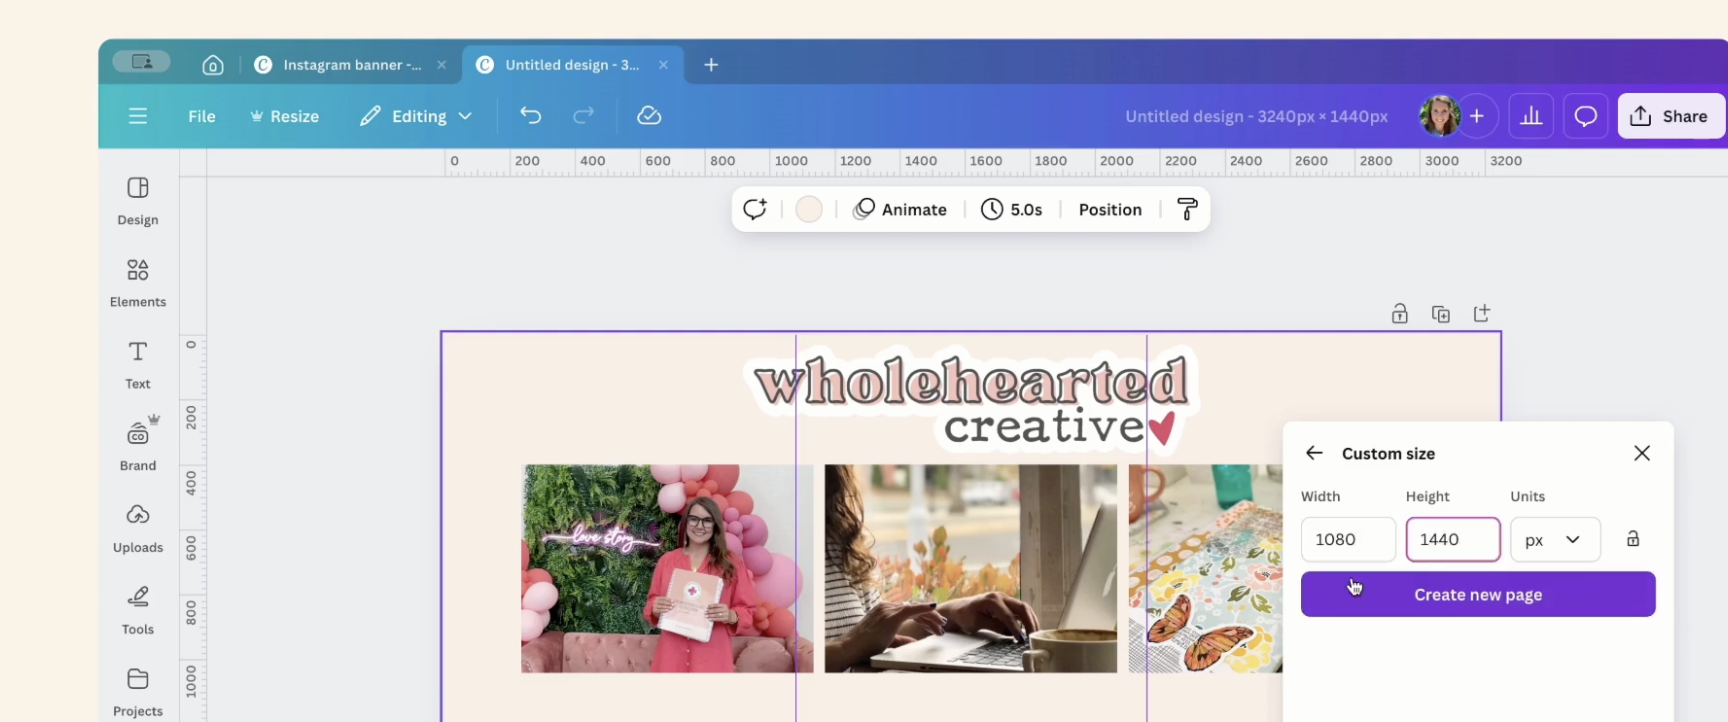
Under the banner image, click the arrow next to “add page” and choose custom size. Set image dimensions to 1080 x 1440.
Click on the new page so it’s outlined in purple, then from the images on the left, click “set background” under the first image.
Click “add page” to add another page the same size as the one you just created and click “set background” on the next image, then repeat this for the third image.


Step 5: Upload to Instagram
Download the three images and send them to your phone so you can upload to Instagram.
Post each image in order, starting from the last one and working backwards (so your banner reads left to right across your grid).
It might be helpful to write out what you want to say under each post in your Notes app.
You can also add multiple images (like a carousel) to give more info/appeal.
Go to the last image (on the right), click the three dots in the upper right corner, and select “Pin to Main Grid”, then repeat with the middle, then left images.